Things have been crazy around here the last week or so. Between two jobs (I now teach kickboxing) and home stuff I feel like I haven’t had a chance to breath a sigh of relief. Dan and I finally set a wedding date…for 2015…and the venue just cashed my deposit…so I guess we have to go through with it, only kidding.
So with all that going on, I’ve been MIA for a couple of blog posts…sorry. But I think this recipe will make up for my absence. Dan keeps asking what my obsession is with Mexican food…somehow we end up having some sort of Mexican cuisine at least once a week. But I don’t think he was complaining too much about these Mexican stuffed shells I picked up from Six Sisters Stuff…he went back for thirds….enough said. This would be a great meal to serve during football season, easy enough to make AND different enough that your guests may be nicknaming you Martha.
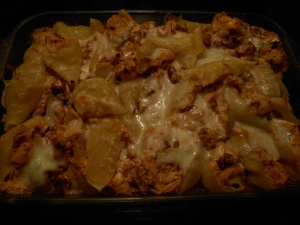
Mexican Stuffed Shells
Ingredients
4 cups chicken breast, cooked and diced
1 can black beans, rinsed and drained
6 green onions, diced
1 green pepper, diced
1 red pepper, diced
3 (8 oz.) blocks cream cheese, softened (not melted)
2 (14 oz) cans diced tomatoes with chiles, undrained (Rotel or store brand)
1/4 cup chicken broth
1 tsp cumin
1 1/2 cups sharp cheddar cheese, shredded
2 cups salsa
40 large pasta shells
Directions
Directions:
1) Cook pasta shells in well salted, boiling water until al dente (still have a little bite to them- if you cook them too long, they will be difficult to stuff). Drain the pasta and set aside while you make the filling.
2) For the filling, add diced chicken, drained black beans, green onions, diced peppers, and cumin into a large mixing bowl. Mix well.
3) In a separate bowl, mix the cream cheese, chicken broth and undrained tomatoes with chiles. When thoroughly combined, pour it over the chicken mixture and mix well (if you have trouble incorporating the cream cheese and tomatoes, you can heat it slightly in the microwave).
4) You will need either 2 9×13″ baking pans OR one large baking sheet. Spread 3/4 cup salsa in the bottom of each 9×13″ baking pan.
5) Using a spoon, fill each of your cooked pasta shells with chicken mixture, setting them into the salsa-covered pan. Continue until all shells are filled and arranged in the pans.
When the pans are full, drizzle the shells with the remaining 1/2 cup of salsa (1/4 cup per pan) and then sprinkle with the shredded cheddar cheese.
3) Cover the baking pan tightly with foil and bake at 350 degrees for about 30 minutes or until hot and bubbly.